In this demo I will show how to refresh database target configuration to get the updated init parameter compatible.
The database dbtest1 just had its compatible parameter changed to 11.2.0.3.0 and the database has been restarted. Enterprise Manager still shows the compatible parameter as 11.2.0.0.0.
4. Select initialization parameters in the search field type comp and click search.
5. You can see the date show Jul-5th which was more then two week ago. You an also see that the compatible parameter says 11.2.0.0.0.
6. Right click on top of the database target name and select refresh. The will start the refresh process.
You will see a successful confirmation message.
Note: If you receive an error message like the one below click here to go to resolve section.
7. Select initialization parameters in the search field type comp and click search. You can now see the collected date show Jul-19 and compatible now shows 11.2.0.3.0.
Resolve Error from Refresh Configuartion
1. Go to the agent home page and select agent>resynchronization
2.
2. Click continue
3. Click the job link name
4. Click the running link to monitor the job it runs in about 2 minutes
5. Once the job is successful click here to follow the step in the refresh target configuration section.
4. Select pluggable database set your host credentials then click schedule customized backup
5. Click the add button to select the PDB
6. Select the PDB and click select
7. Click next
8. Backup type is full in my case I want to delete the archivelog when the backup completes as well as any obsolete backups then Click next
9. You can leave the default settings or update as needed then click next
10. Set the schedule for the backup job in my case I want to run immediately then click next.
11. Here you can review the backup job configuration you can even copy the content of the RMAN script that will be executed if you wanted to execute out side of Enterprise Manager.
Once you complete the review click submit job.
12. Click view job
13. Click the running link for the backup step to review execution.
14. You can monitor the RMAN script execution output as needed.
15. After the backup is successful you can review the output to see everything that was backed up. The PDB backup is faster then a whole database backup as the whole database backup will backup the CDB and all PDBs.
I am going to take my existing Oracle Database 12.1.0.1 non-CDB and use Enterprise Manager 12.1.0.1 to provision a pluggable database into my existing CDB.
This blog post is part of my Oracle database consolidation blog which you can read here.
Demo
I will be using my dbtest3 12.1.0.1 non-CDB database to plug into my container database testdbs.
Note:
The non-CDB must already be 12.1.0.1 and above.
1. Login to OEM and go to the container testdbs database home page.
3. Click on Oracle Database>Provisioning>Provision Pluggable Databases>
4. Select migrate existing databases and click launch.
5. Select plug as a PDB set your Oracle home credentials and click next.
6. Click add and select the database we are going to adopt then click select.
7. Set the database and host credentials, set the export directory, fill in the destination information, select datafile location and import directory then click next.
In my case I used the same directory for export and import but these directories can be different.
I set the name of the PDB to tstdb but you can leave the PDB name the same as the non-CDB.
8. Pre-check process will begin...
9. When validation is complete click close.
10. Give the job a new and description then set the schedule and click next.
In my case I left the name as is and the schedule as immediately.
11. Review your migration job and click submit.
12. Confirmation of job successful submitted will pop up click view job.
13. You can review the procedure activity to see the status of each step in the process. Expand the procedure steps and select the step. In the step details you can review the details of the step or steps you have selected.
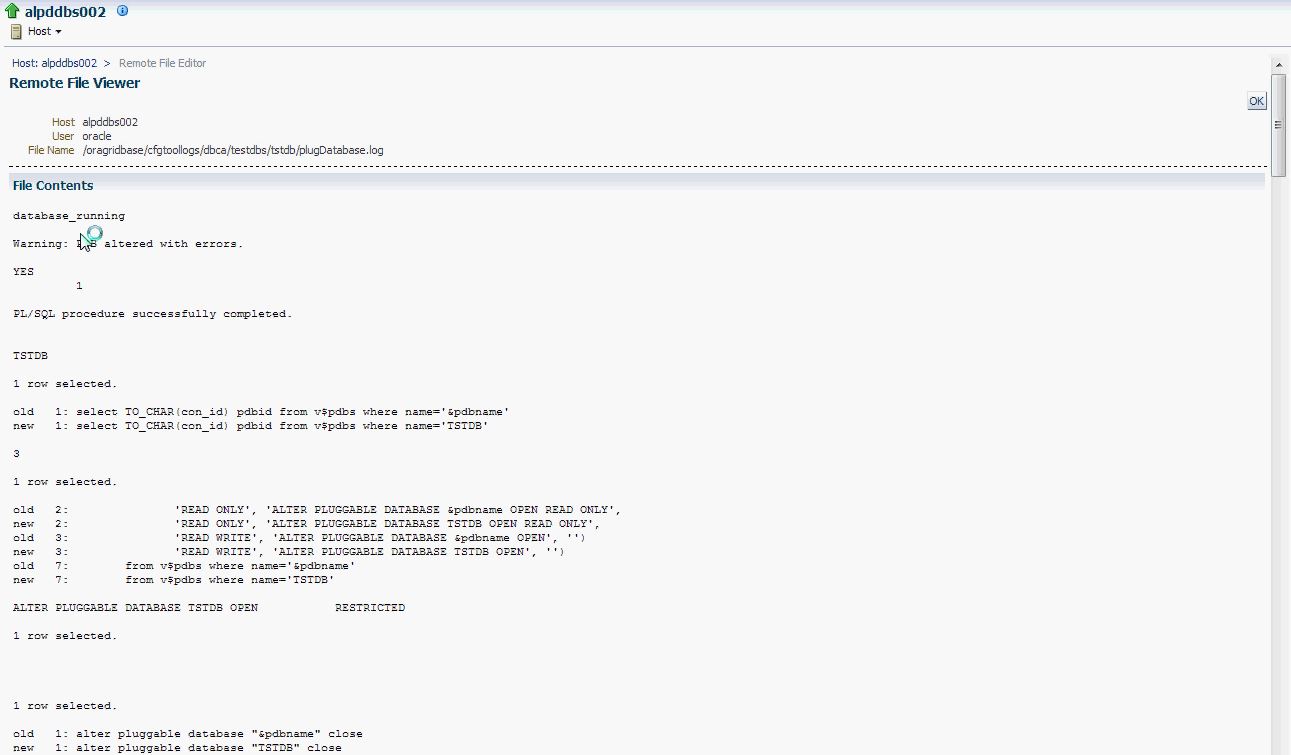
14. In the below screenshot you can see in the step details it list the logs that are being created for the procedure step "Create Pluggable Database Step" click the link of the log to see what is written into the log.
15. Here we can see the output of the log as the step is running.
16. To get back to the job activity click Enterprise>Provisioning and Patching>Procedure Activity.
17. Click the job name
18. When the job completes all procedure step will show completed.
Note if you see an then these means the step is skipped because it did not need to execute.
19. We can now see the non-CDB has been plugged into the CDB and added as a target to Enterprise Manager.
20. From the container home page we can see information about the pluggable database.
If you want to watch my YouTube video for the demo above see below.







 this means the target has been configured


